ICM OV-10D+ Bronco in 1/72nd Scale
He shows us how he built his kit before painting & weathering begins in Pt.II…
.webp)
From ICM
1/72nd scale
#72186
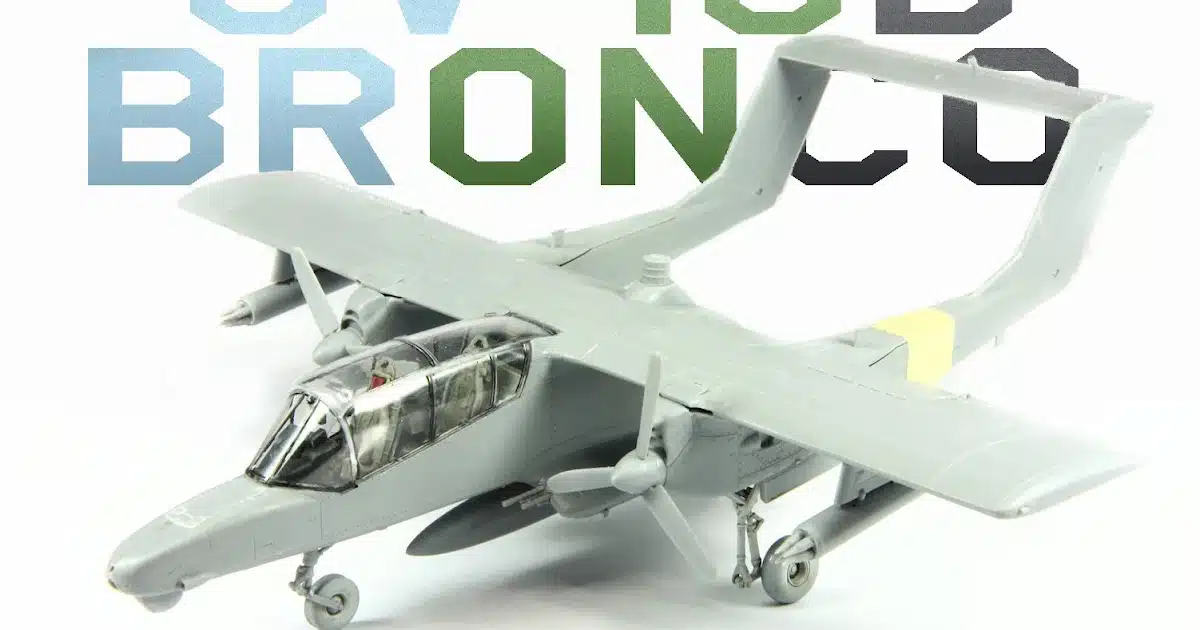
ModelThe OV-10D+ Bronco was extensively modified from the OV-10A and featured a Forward Looking Infra Red (FLIR) night vision system with turret mounted camera systems under an extended nose. In Part II, he shows how he constructed his model before beginning the painting and weathering.
.webp)
OV-10D+ Bronco.

From ICM 00100101/72nd Scale #72186

The OV-10D Bronco is a heavily modified version of the OV-10A. It features a Forward Looking Infra Red night vision system as well as a turret-mounted camera system. The OV-10D Bronco was also improved with larger engines, fibre-glass propellers on tail booms, and exhaust stacks that suppressed infrared light. This kit depicts the OV-10D+, a development of the OV-10D that included rewired wings and engine instruments with tapes instead of round dials. The OV-10D+ kit was a further development of the OV-10D. It was primarily used by the US Marine Corps as a Forward Air Control aircraft until 1995, when it was phased out. However, it continued to be in service with many other countries, including Thailand, Venezuela and The Philippines. The 1/72 “D” model is a scaled down version of the 1/48 OV-10D that was released in 2021, just after the OV-10A. It has a very high moulding quality with little flash. The only mould pin marks that are visible on the model are in places where they will not be seen. The box contains four grey plastic sprues with one clear sprue, and an attractively printed decal sheet. Four marking options are included for US Marine Corps aircraft from the 1990/1991 “Desert Storm” era.
The marking choices in this boxing…
.webp)
.webp)
.webp)
.webp)
Onto the model then and I made a start with the cockpit which went together well. The instrument panel has raised details, although you can use decals instead. The cockpit was painted with Vallejo acrylics, then I dry brushed the cockpit using oil paint.
.webp)
.webp)
The cockpit was sprayed a medium grey then had various details painted with Vallejo acrylics, after which I dry brushed the cockpit with oil paint.
.webp)
With the cockpit painted I added pieces of lead to the nose as experience with the 1/48 Bronco showed it to be a tail sitter;
.webp)
Also the holes for the weapons pylons were opened up before gluing the wing halves together.
.webp)
When dry the plastic was sanded to the shape of the flaps then the flaps were glued into place, after which the wings were glued to the fuselage. It was a good fit, but I needed to add some filler where the rear end of the wings met the fuselage. Also around the rear fuselage. I also removed the pitot tube from the nose as it is thick and easy to break off so this will be replaced later on at painting. The tail booms, wing and CG were assembled but I left them out until I painted the model. This was inspired by another modeller’s idea (Drewe manton please take a bow). I struggled to get a decent paint finish on the fuselage of the 1/48 OV-10A due to the proximity of the booms, something that would be even more difficult due to the smaller scale.
.webp)
Another good reason to leave them until last is that after dry fitting the wing and checking the centre of gravity (CG), it soon became clear that the weight I had put in the nose wasn’t going to be enough to prevent the model from sitting on its backside. The booms being separate, I could add lead to the engine nacelles in order to counteract the effect.
.webp)
After checking the fit, I inserted a length sprue between the two boom halves, and cut it to size to fill any gaps.
I used epoxy resin instead of superglue to glue the weight into place as I did not want the lead to react chemically (I read this somewhere on the Internet, so it’s probably true). The front booms needed some filler as well. I started by assembling the main undercarriage, then I added the sides of the canopy. I then glued them together and fitted the upper canopy. The sides of the canopy did not touch the cockpit ledges, so I clamped the fuselage side, then glued the canopy into place, and left it for two days to dry. The excess plastic was then removed, and the exhausts looked much more realistic. The model was now almost fully assembled and I thought I would check to see if it still sat on its tail. Surprisingly, the answer was yes. YAY! Finally! !
While getting the model ready for the final pictures I was trying to attach the rocket pods to the wings, only to find that the locating holes are about 2mm out….oops.
.webp)
I filled in the two front holes and cut off the front locating pegs on the sway braces on the pylons. Also the front nose gear leg will not fit between the undercarriage doors so it was trimmed down and will be superglued into place during final assembly.
.webp)
With those two issues sorted the model had various parts temporarily glued into place using white PVA glue then photographed before everything dropped off. The nacelles, wings and other parts may appear to have large gaps but these will all be glued in place once painted.