ICM’s Mercedes Typ 320 Soft Top (W142), in 1/35th size.
Build Review Pt II: Typ 320 (W142) Soft Top
From ICM
1/35th scale
Model #35542
Price: $48 USD from Hobbylink Japan
Product link on the ICM website.webp)
.webp)
Today: PT II: Painting and weathering…
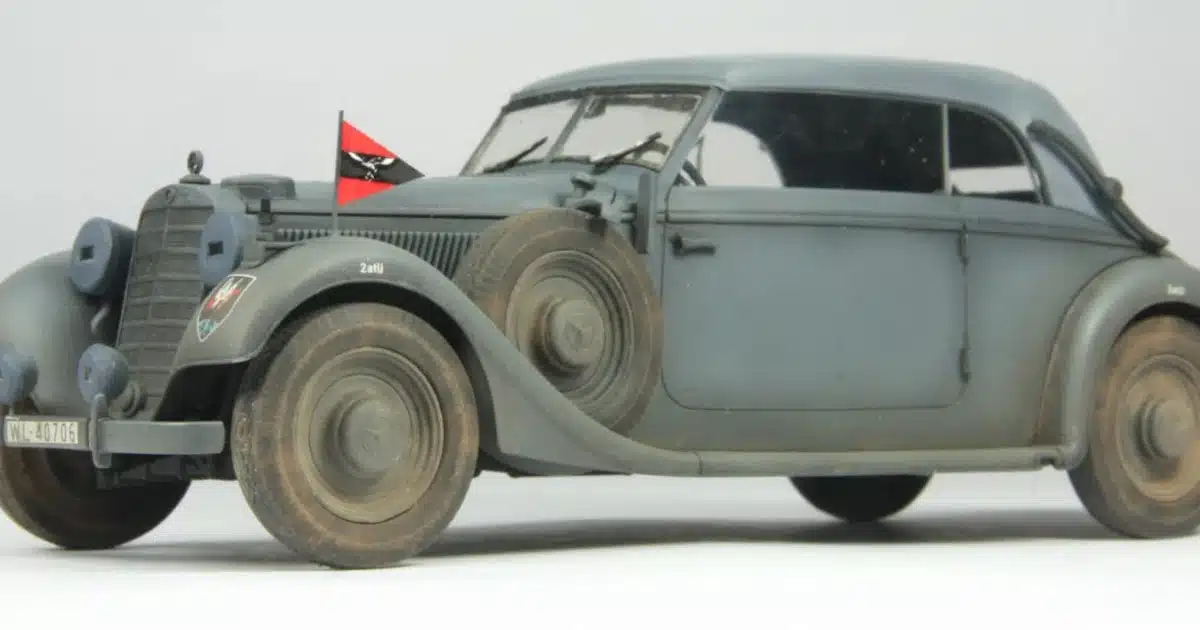
Now that the model had been built in part one of the build review it could now be finished so as usual I sprayed it with an overall coat of flat black using Tamiya LP-3.

Although the rear seat back was fixed into place, the other seats and steering wheel were not glued in as it would make painting them much easier so the model was sprayed with Tamiya LP-27 German Grey then had some LP-34 mixed in to spray in between the panels, adding more light grey to spray the highlights such as the tops of the headlights and edges of the bodywork. The model had to be given two coats of Tamiya X-22 clear to help it cure as the paints are quick to dry. The decals were sprayed with Micro Sol to make them adhere better and then the model received another coat of X-22. After allowing the paint to dry, I gave the model a pinwash of sepia-colored oil paint and then sprayed it with VMS Satin varnish. The blackout cover for the headlights was needed. To do this, the inside of the light fixtures were painted with chrome using the Molotow paint pen. Next the masking covers were cut from masking tap using a compass. The lenses of the lower lights needed some sanding to make them fit correctly. Tamiya XF-10 flat brown was used to paint the seats, being careful not to get any on the grey interior sides. Vallejo 118 Burnt Umber acrylic lightened and darkened to suit was then used for the shadows and highlights;

The rear light lenses were painted with Vallejo white then red and when dry given a wash of sepia oil paint.


Although not shown in the picture (because I had forgot…duh), the reflector on the lower left fender was also painted as described above. The soft top was painted with LP-12 IJN Grey from Kure Arsenal with some lighter grey for highlights. It was easier to cut the decal into two parts than to apply it as one piece. I had trouble matching up both sides and in hindsight it would have been better to use two separate pieces. The kit was easy to put together, apart from the fact that I was having trouble matching the two sides of the decal. I would recommend cutting the decal in half. The running boards and curved fenders are great features of these cars. One day I may even build one that is shiny.