
Tamiya 1/35 M36 (#35390) vs Full-Interior Armor Kits: Worth It?

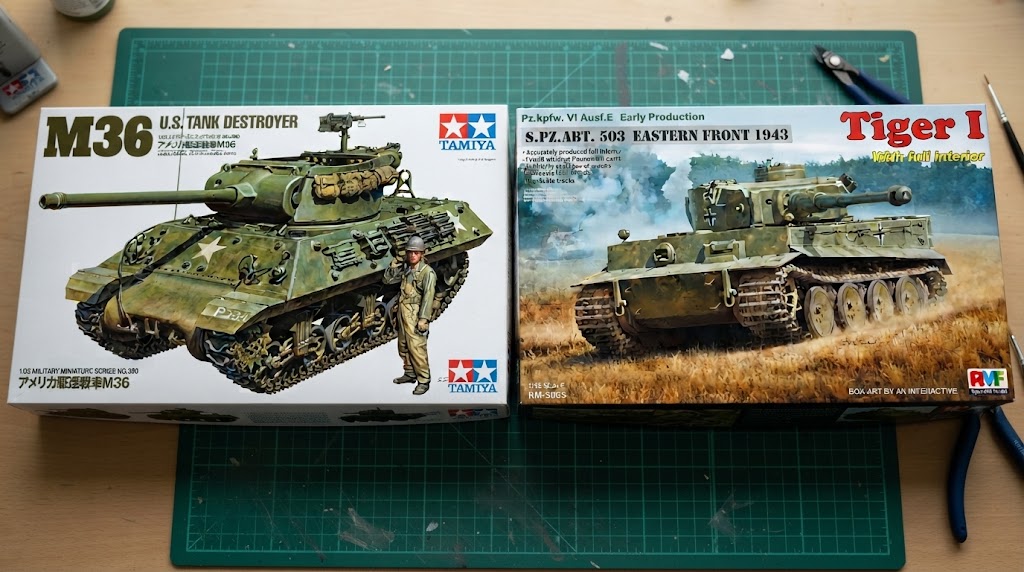
Tamiya’s 1/35 M36 Jackson (#35390) vs. MiniArt & Ryefield Full-Interior Armor Kits: Are 1,200-Part Tank Interiors Actually Worth Your Sanity? (2026 Guide)
Every 1/35 armor builder has a box sitting on the top shelf of their closet that they are secretly terrified to open. You bought a MiniArt, Ryefield Model (RFM), or Takom Full-Interior kit on a rainy Friday night because the 3D CAD renders on the side of the box looked incredible. Then you cracked the lid, counted 34 grey sprues, 1,350 styrene parts, two sheets of microscopic photo-etch brass, and 96 individual three-piece workable track links per side—and quietly slid the lid right back on.
Meanwhile, across the aisle, Tamiya drops their new-tool 1/35 U.S. Tank Destroyer M36 (#35390). It has roughly 280 crisp parts, link-and-length tracks that go together in twenty minutes, and an open-topped turret that actually lets you see the 90mm M3 gun breech, radio rack, and crew compartment without needing a dental mirror or an endoscope. Whether you are eyeing modern heavy metal from our Tamiya 1/48 F-14B Tomcat (#61129) & Border 1/35 Leopard 2A8 coverage or deciding how to spend your winter bench time, let’s talk honestly about the Tamiya 1/35 M36 Jackson 35390 vs full interior armor kits debate—and why gluing 60 hours of transmission work inside a dark hull is the biggest rite of passage in armor modeling.
Disclosure: Hobbyzero is reader-supported. If you pick up kits or tools through our links, we may earn a small coffee-fund commission at no extra cost to you.
⚡ The Real-World Bench Summary (No Marketing Fluff)
- Why Open-Topped Vehicles Are the Sweet Spot: Kits like the Tamiya 1/35 M36 Jackson (#35390), M18 Hellcat (#35376), or Marder III give you 80% of the visual fun of an interior build (gun breech, ammo racks, fighting compartment floor) in a weekend-friendly 280-part package where everything remains 100% visible on the shelf.
- The “Paint Increases Thickness” Trap on Full Interiors: MiniArt and Ryefield engineer their internal bulkheads, torsion bars, and firewalls to zero-millimeter CAD tolerances. If you spray primer and paint over the mating tabs inside the lower hull, the upper glacis plate will not close flush three weeks later!
- MiniArt vs. Ryefield (RFM) vs. Takom: Ryefield has the sharpest, most forgiving fit of the big full-interior brands; Takom strikes a smart balance by molding sub-assemblies in fewer parts; MiniArt has unmatched museum detail, but attaches delicate levers with 5 thick sprue gates per part.
- Don’t Build What You Won’t Show: Unless you are leaving the turret off on a maintenance gantry, cutting away the hull roof, or using clear armor plates, skip gluing and painting the 70-part transmission buried under a closed glacis plate!
Weekend Sanity vs. 1,200-Part Marathons: 2026 Armor Comparison
| 1/35 Armor Kit | Part Count & Tracks | Interior Visibility | Real-World Build Experience | Link |
|---|---|---|---|---|
| Tamiya 1/35 U.S. M36 Tank Destroyer (#35390) | ~280 Parts (Link-and-Length) | 100% Visible (Open-Top Turret) | Pure stress-free joy; ready for primer in two evenings | Amazon |
| Ryefield (RFM) 1/35 Sherman / Tiger I Full Interior | 1,000+ Parts (Workable Links) | High (Optional Clear Hull/Turret) | Best-engineered full interiors on the market; crisp fit | Amazon |
| MiniArt 1/35 StuG III Ausf. G / T-34 Full Interior | 1,150+ Parts (Indy Links + PE) | Low-Medium (Open Hatches / Roof Off) | Incredible museum detail, but soft plastic & heavy gate cleanup | Amazon |
| Takom 1/35 Panther / King Tiger Full Interior | 950+ Parts (Link-and-Length / Indy) | Medium (Removable Upper Hull) | Smart sub-assembly breakdown; faster build than MiniArt | Amazon |
Why Tamiya’s Open-Topped M36 (#35390) Is Engineering Genius
When you build a closed-turret tank like a Tiger I or a modern Leopard 2A8 vs 2A7V, any interior detail you paint inside the hull disappears forever the moment you glue the roof on—leaving you to tell visitors, “I swear there’s a fully wired Maybach engine in there!” (also known on Reddit’s r/SocietyofHiddenPaint as the ultimate modeler’s curse).
That is why open-topped WWII tank destroyers like Tamiya’s 1/35 M36 Jackson (#35390) and their M18 Hellcat (#35376) are the secret weapon for builders who want to paint an intricate interior without losing six months of their life:
-
You Only Build What the Human Eye Can Actually See: Looking down into the open top of Tamiya’s M36 turret, you get a dead-clear view of the massive 90mm M3 main gun breech, recoil guard, elevation handwheels, ready-round ammunition racks, folded crew seats, and turret basket floor. Tamiya puts 100% of their mold detail right into that open fighting compartment—and skips the invisible radiator fans buried under the rear deck.
-
Sub-Assembly Painting That Actually Fits: Because Tamiya designs their interior floors and turret walls with positive keyed slots, you can airbrush the interior in US Ivory / White or Olive Drab using our How to Thin Vallejo, Citadel & Tamiya Paints for Airbrush (2026 Chart), chip the floor plates, wash the breech with our Oil Paint Rendering vs Enamel Washes Guide, and drop the finished turret halves together with zero gaps!
Surviving a 1,200-Part Full-Interior Kit (Without Throwing It Against the Wall)
What if you do want the meditative, 3-month challenge of building a full-interior Ryefield, MiniArt, or Takom beast? Before you snip part A1 off the runner, follow these four hard-learned workbench rules:
1. Scrape Every Single Mating Edge Free of Paint!
This is the #1 reason full-interior builds end in disaster at Step 48. In a full-interior kit, the driver’s transmission, torsion bar tubes, ammo bins, firewall, and engine block all stack on top of the lower hull floor.
-
The Math Problem: One layer of primer + one layer of basecoat + one layer of gloss varnish adds roughly 0.08mm of thickness to a plastic joint. Multiply that across ten stacked internal bulkheads and ammo racks, and suddenly your internal fighting compartment is 1.5mm too tall—meaning when you try to glue the upper hull roof down a month later, it rocks like a seesaw with a huge gap along the fenders!
-
The Rule: Tape off or scrape every single structural tongue-and-groove mating slot down to bare grey plastic with a #11 hobby knife so you are welding plastic-to-plastic using our Tamiya Extra Thin vs Quick-Setting vs Mr. Cement S Guide.
2. Use Single-Blade Nippers on MiniArt’s Fragile Levers
If you have ever built a MiniArt kit, you know their styrene is slightly softer than Tamiya’s, yet they mold hair-thin transmission shift levers and shell fuze caps attached to four or five thick sprue gates. If you try clipping those with standard double-blade cutters, the lever will snap in three places before it even leaves the tree. Use the “Two-Cut Method” with a single-blade finisher from our GodHand SPN-120 vs DSPIAE ST-A 3.0 vs Tamiya 74123 Bench Test (or a micro razor saw) to free delicate control linkages safely.
3. Dry-Fit the Outer Hull Shell at Every Single Step
Never build the entire interior from Step 1 to Step 35 without touching the upper hull! Keep the outer hull roof and glacis plate taped together next to you on the desk. Every time you glue an ammo rack, radio frame, or firewall into the lower tub, drop the upper hull shell on top while the glue is still slightly rubbery to verify that nothing is colliding with the roof.
Top 3 Kits for Interior Detail Lovers (Honest Pros & Cons)
1. Tamiya 1/35 U.S. Tank Destroyer M36 (#35390) — Best “Maximum Visible Detail, Zero Burnout” Build

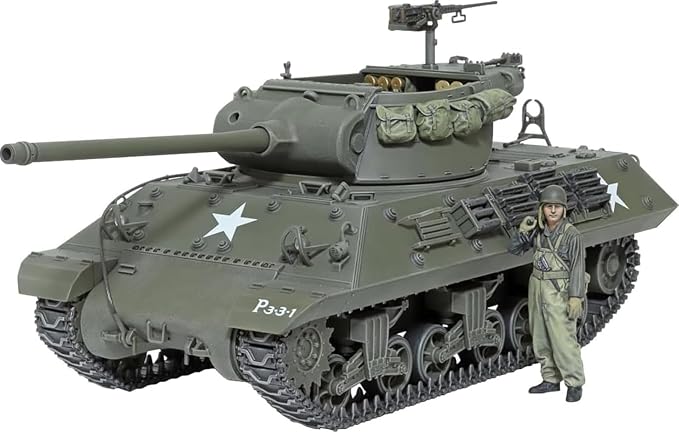
Replacing Tamiya’s ancient 1970s motorized mold, the modern 1/35 M36 Jackson (#35390) is a masterclass in smart engineering. You get a fully detailed open-top turret fighting compartment, realistic cast texture on the massive rear counterweight bustle, a sharp two-figure crew (commander and loader), and link-and-length T49 tracks that assemble on a one-piece jig without needing a magnifying glass.
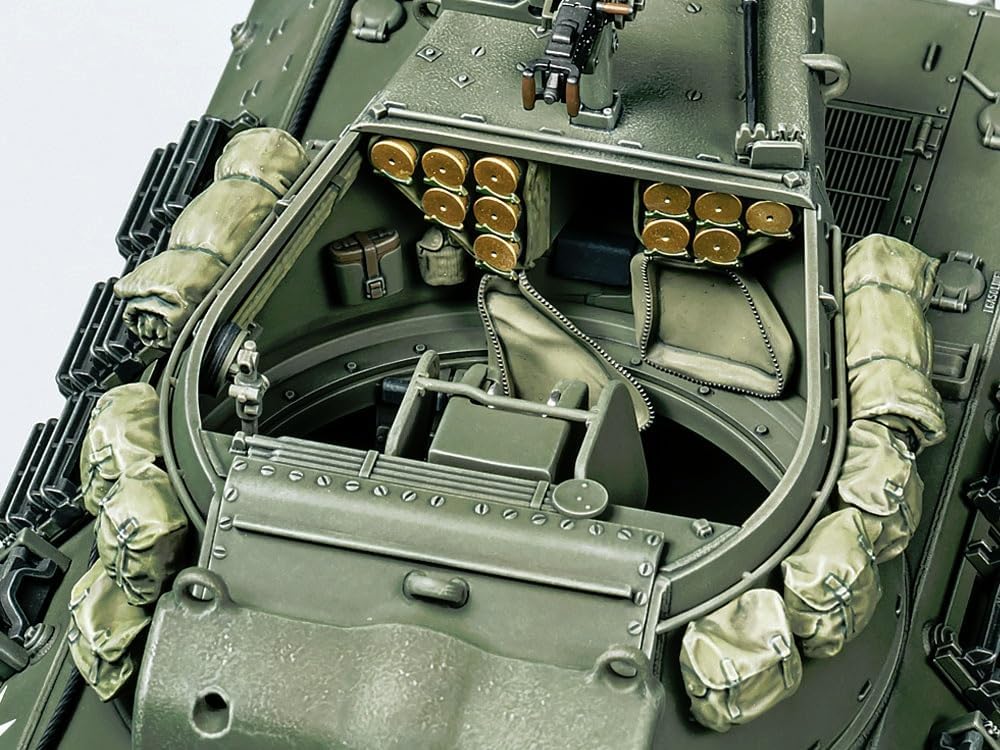
✅ Why We Love It on the Bench:
- Every single hour you spend painting and weathering the 90mm breech and turret interior stays 100% visible from above
- Rock-solid Tamiya fit means you spend your time airbrushing and weathering instead of filling gaps
- Pairs wonderfully with olive drab modulation using our ATOM by Ammo or Tamiya XF ratios
⚠️ Watch Out For:
- Paint the turret interior sub-assemblies and the 90mm gun barrel before gluing the gun into the trunnion mounts!
👉 Check price on Tamiya 1/35 M36 Tank Destroyer (#35390) on Amazon
2. Ryefield Model (RFM) 1/35 Full-Interior Series (M4A3E8 Easy Eight / Tiger I) — The Gold Standard for Full Interiors
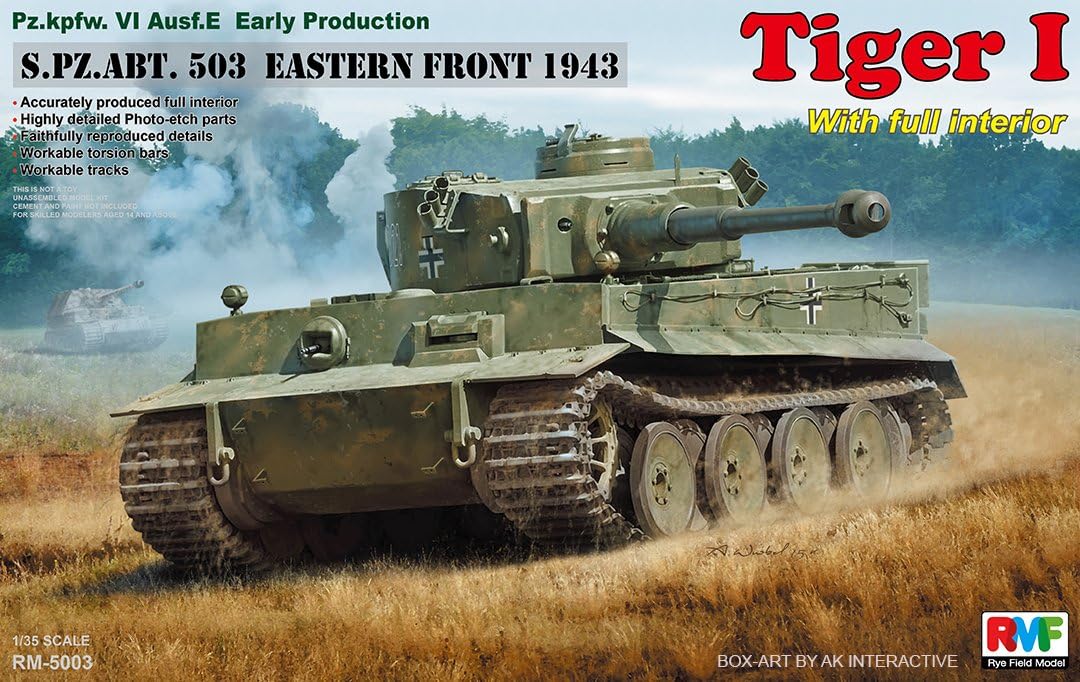
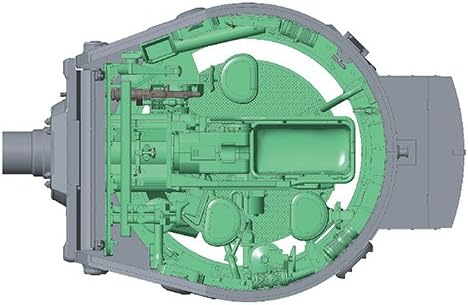
If you are ready to tackle a true 1,000+ part full-interior tank, start with Ryefield Model (RFM)—especially their #5028 M4A3E8 Sherman or #5003/5025 Tiger I boxings that include **crystal-clear upper hull and turret armor shells**. Because RFM molds the outer armor in clear styrene, you can mask off “cutaway windows” on the left side of the turret and engine deck while painting the right side in standard camouflage—solving the “hidden paint” problem without touching a Dremel saw!
✅ Why We Love It on the Bench:
- Crispest styrene molding and best alignment pins of any full-interior manufacturer
- Clear-hull editions let you leave one half of the tank unpainted or masked to show off the engine and ammo bins
- Workable track jigs make assembling individual track pins much faster than old-school Dragon kits
⚠️ Watch Out For:
- Double-check the instruction callout numbers—RFM manuals occasionally have a swapped part number on right/left torsion bar arms!
👉 Check price on Ryefield Model (RFM) 1/35 Full-Interior Kits on Amazon
3. MiniArt 1/35 StuG III Ausf. G & T-34/85 Full-Interior Kits — Ultimate Detail for Diorama Builders
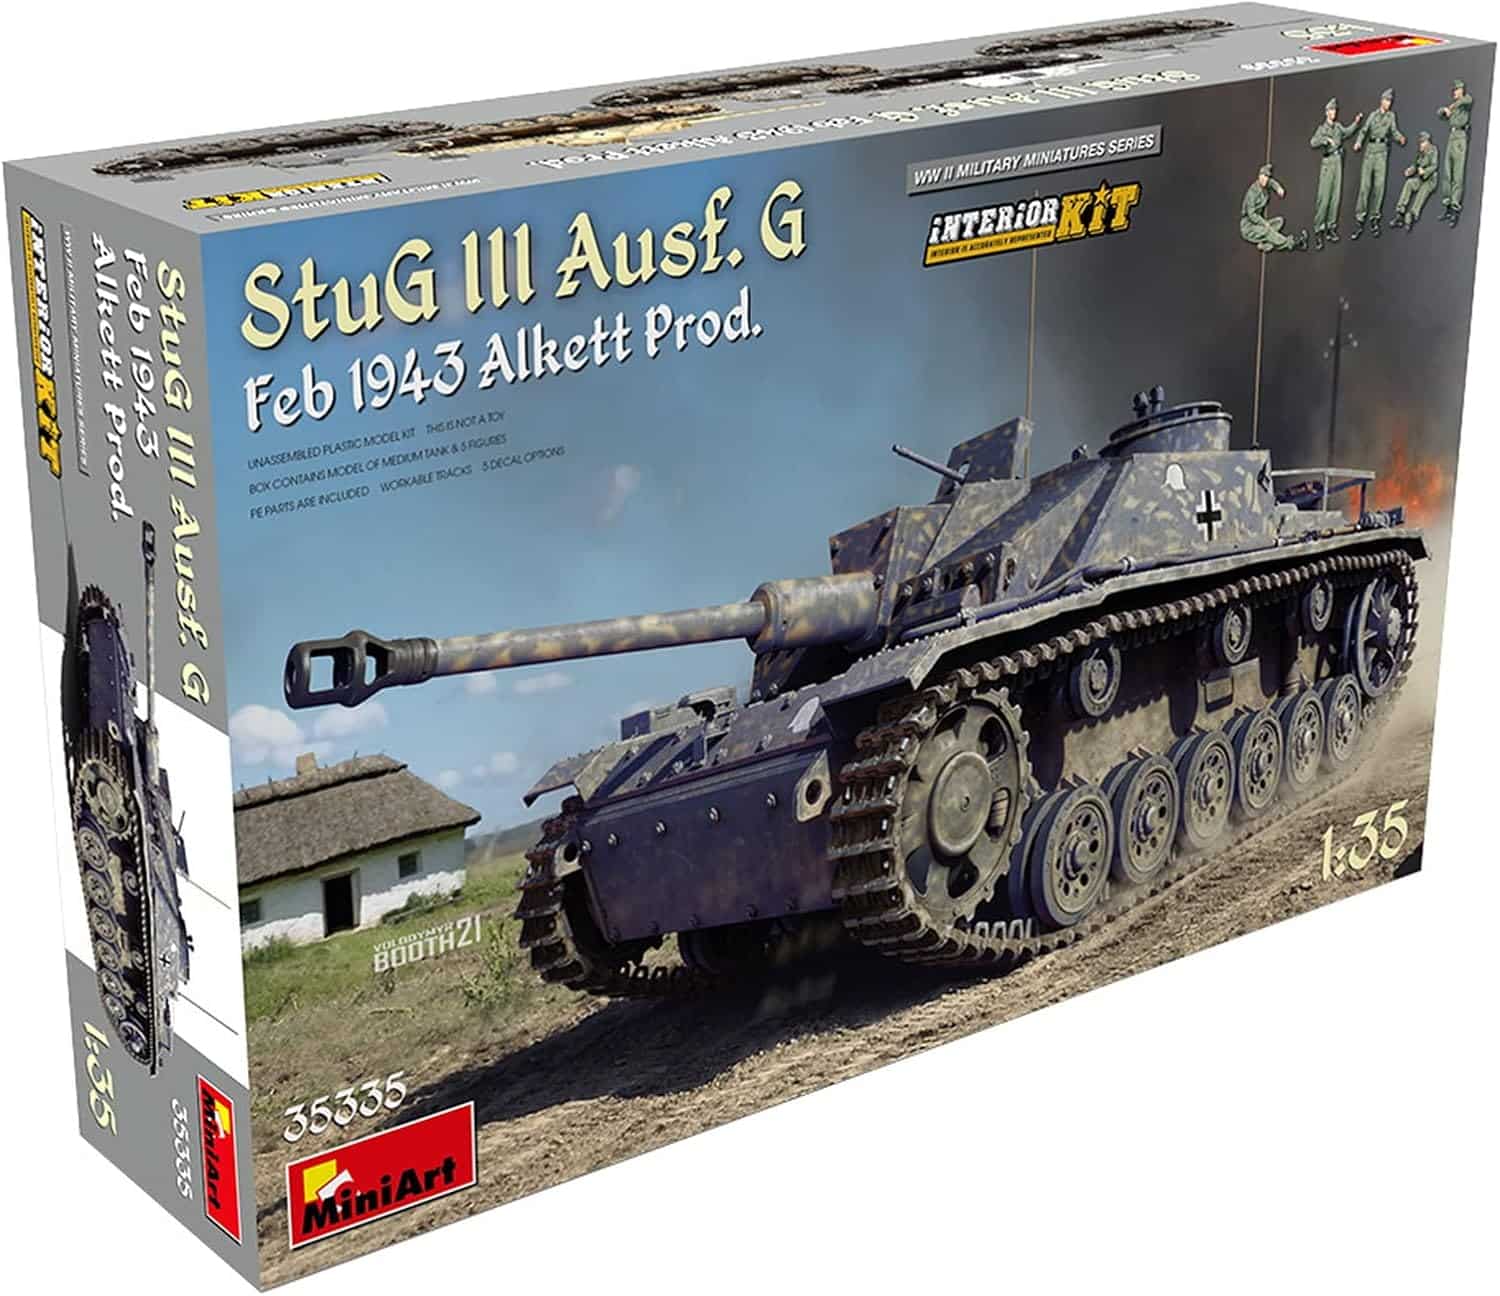
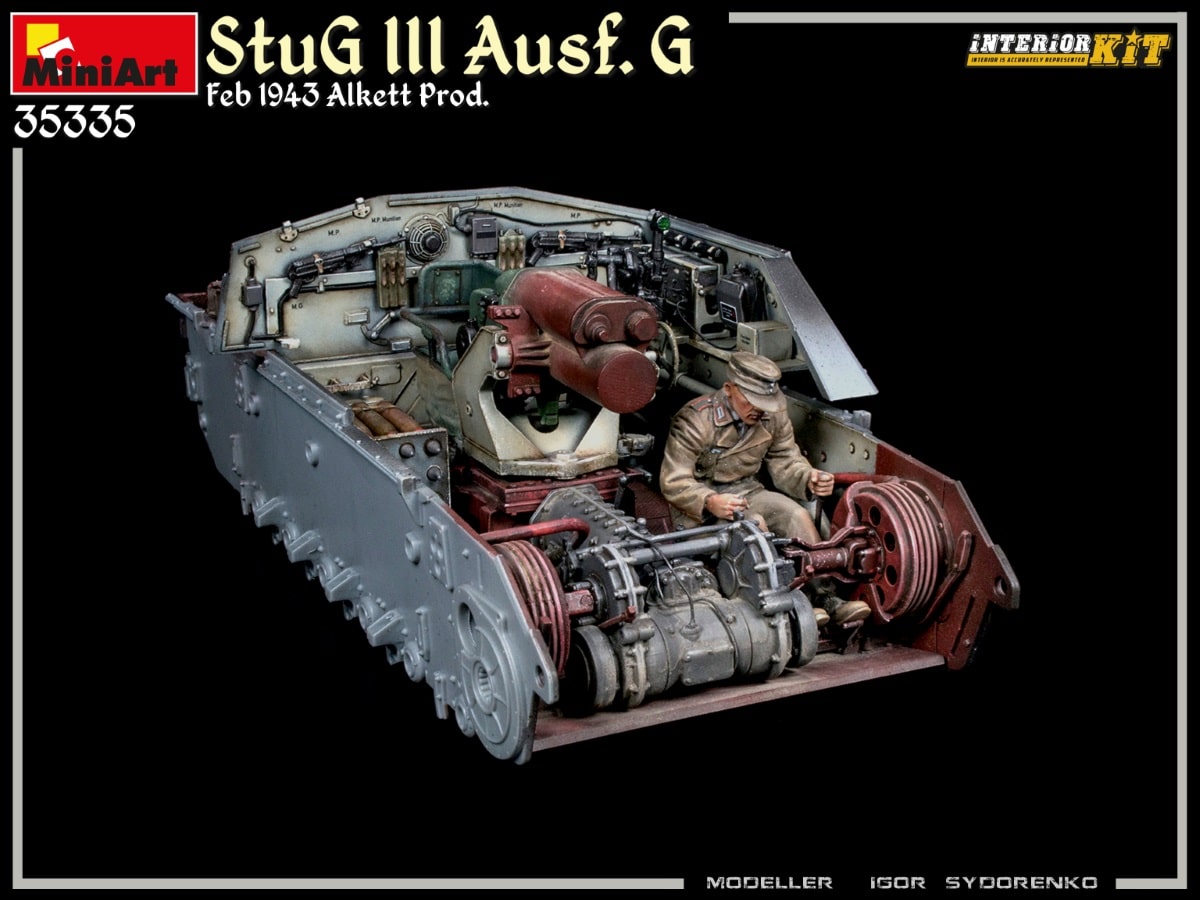
Nobody in the industry goes harder on historical variants, engine plumbing, and brass shell stenciling than Ukraine’s MiniArt. When you open a MiniArt full-interior StuG III, Panzer IV, or T-34/85, every single radio transformer box, transmission linkage rod, and ammo crate is a miniature kit in itself—complete with a whole decal sheet of tiny stencil markings just for the 75mm and 85mm projectiles (bring your Tamiya Mark Fit Strong & Mr. Mark Setter!).
✅ Why We Love It on the Bench:
- Unrivaled historical accuracy down to factory-specific weld seams and fender brackets
- All crew hatches, engine access doors, and transmission inspection plates are engineered to pose wide open for maintenance dioramas
⚠️ Watch Out For:
- Not for impatient builders—cleaning sprue gates off 1,100+ tiny parts requires sharp nippers and taking breaks so you don’t burn out!
👉 Check price on MiniArt 1/35 Full-Interior Armor Kits on Amazon
3 Clever Ways to Display a Full-Interior Tank (So You Don’t Glue It Shut!)
If you spend 80 hours painting a German Maybach HL230 V12 engine, wiring the radio headphones, and chipping the cream-white (Elfenbein) walls with a brush from our Harder & Steenbeck Ultra 2024 vs Iwata Eclipse HP-CS vs PS-289 test, do not glue the roof shut! Here is how competition winners display full interiors:
-
Neodymium Rare-Earth Micro Magnets (2mm x 1mm): Drill four shallow 2mm dimples into the corners of the lower hull sponsons and matching dimples under the upper hull roof. Superglue tiny 2x1mm N52 neodymium magnets into the holes. The upper hull snaps down with zero visible gap, and lifts right off in one second whenever you want to show off the interior!
-
The “Exploded Museum” Acrylic Rod Mount: Drill two holes into a wooden display base and mount the completed upper hull and turret floating 2 inches above the lower hull on clear 4mm acrylic rods (or brass tubing). Viewers can see both the finished exterior camouflage and the entire fighting compartment below at a single glance.
-
The Field Maintenance Gantry (Strabo Crane): Pose the turret lifted off the hull ring suspended from a 1/35 Fries Kran (Strabokran) or a wrecker recovery crane with the engine deck hatches propped open and two mechanics leaning inside.
Frequently Asked Questions (FAQ)
Were WWII U.S. M36 Jackson open-top turrets painted White or Olive Drab on the inside?
Unlike enclosed Sherman tanks (which were painted bright gloss white inside to help the crew see in the dark), open-topped U.S. Tank Destroyers like the M36 Jackson, M10 Wolverine, and M18 Hellcat had their upper turret fighting compartments painted in non-reflective Olive Drab so German reconnaissance planes flying overhead wouldn’t spot a glowing white circle from the sky! Only the enclosed lower driver’s compartment and engine bay firewall down inside the hull were painted white.
What color was the inside of WWII German tanks (Panzer IV, Tiger, Panther)?
Most wartime German enclosed fighting compartments were painted in RAL 1001 Elfenbein (a warm, slightly yellowish Cream Ivory) from the turret basket up so light would bounce around inside, while the lower hull floor plates, torsion bars, and transmission housing below the crew’s knees were left in Rotbraun (Red Oxide Primer) or grey-green primer to hide grease and boot dirt.
How many hours does it take to build and paint a 1,200-part full-interior tank kit?
Whereas an open-topped Tamiya 1/35 M36 (#35390) takes roughly 15 to 25 hours to build, paint, and weather to a high standard, a 1,200-part MiniArt or Ryefield Full-Interior kit typically takes 80 to 140 hours because you are essentially building, masking, painting, and weathering four separate models (engine bay, driver/transmission compartment, turret basket, and exterior hull) before final assembly.
